

Abrasive Manufacturer Guide to Choosing the Right Abrasives
2026-09-26
Selecting the right abrasive can mean the difference between a flawless finish and a costly rework, yet many manufacturers overlook the science behind grit, bond, and backing. In this guide from SHENZHEN SUN ABRASIVES, we strip away the guesswork—covering material compatibility, grit progression, and application-specific solutions that keep your production line running smoothly. Whether you’re grinding hardened steel or polishing delicate alloys, you’ll find practical insights to sharpen your process and reduce waste.
Why Buying by Brand Alone Leads to the Wrong Abrasive
Brand loyalty can feel like a shortcut to quality, but abrasives are not one-size-fits-all. A disc that dominates in one workshop might fail miserably in another because grit composition, bonding agent, and backing material are tuned for very specific tasks. When you choose purely by the label on the box, you ignore the variables that actually determine performance on your particular metal, wood, or composite surface.
The mismatch often reveals itself slowly—excessive heat buildup, premature loading, or a finish that needs twice the hand sanding to correct. Over time, these inefficiencies add up to wasted labor and higher consumable costs. What looks like a bargain from a trusted name can quietly burn through your budget, simply because the abrasive was never engineered for the pressure, speed, or material you're working with.
Smart buyers flip the equation: start with the application, then find the abrasive that matches its demands. Whether it's ceramic alumina for aggressive stock removal or silicon carbide for glass and stone, the right choice depends on the job—not the logo. Stepping away from brand-only thinking opens the door to specialized products that outperform household names on identical tasks.
Grain Types That Actually Match Your Metal
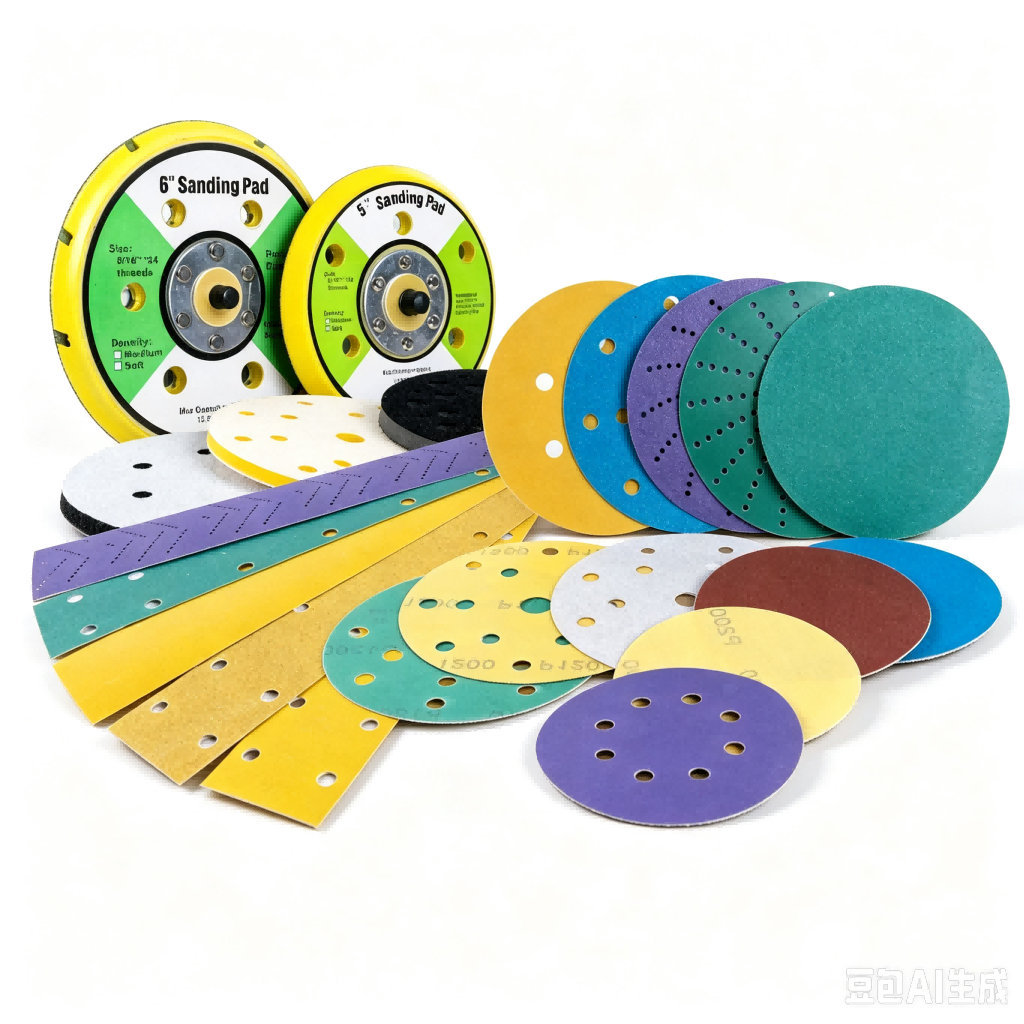
Aluminum oxide remains the most practical starting point for plain carbon steel and cast iron. Its blocky crystals stay sharp longer under moderate pressure, producing a cool cut without excessive sparks. If your project involves stainless or high-tensile alloys, though, zirconia alumina tends to hold up better because the grains fracture in a controlled way, exposing fresh edges instead of glazing over.
Ceramic grain becomes the better match when you face hardened tool steels, nickel alloys, or titanium. It needs a rigid machine and steady pressure, but the payoff is a fast, aggressive cut that aluminum oxide simply cannot sustain. For nonferrous metals like aluminum, brass, and copper, silicon carbide is sharper and more friable, so it sheds dull grains quickly and avoids the heat buildup that can smear soft metal across the surface.
A quick test on scrap stock tells you more than any chart. Run the disc at your usual angle and watch how the sparks fly and the finish develops. If the grain glazes or the metal turns blue, switch to a different type before you waste the workpiece.
The Bond Difference You Can Feel in the First Pass
From the very first stroke, the bond locks onto the surface with a subtle pull-back that most formulas only hint at. It’s not a slow, greasy slide—it's a confident grab that tells your hands this layer is already working.
You won't catch yourself going back over the same spot, hoping for more coverage. The first pass lays down an even, almost velvety film that stays exactly where you put it, without sagging or thinning at the edges.
That initial grip translates into a finish that handles daily stress without micro-cracking or peeling. By the time you set the tool down, the bond has already started curing into a hard, resilient skin—quietly proving that the first feel wasn't a fluke.
Reading Grit Numbers Without Falling for the Myths
A grit number tells you how coarse or fine an abrasive is, but the logic trips up plenty of people. Lower numbers mean larger, more aggressive particles—think 40 or 60 grit for ripping off old paint. Higher numbers like 800 or 1000 leave a near-mirror finish. The myth? That a bigger number always means a smoother surface in every context. On soft materials, a coarse grit can actually dig in and leave deeper scratches than a medium one, because the large particles don't fracture as readily. You need to match the grit to the material's hardness, not just chase the highest number on the shelf.
Another trap is assuming all grit scales are identical. A 220-grit paper from a European manufacturer may not match a 220 from an American brand, because they're measured under different standards—FEPA versus ANSI. The particle size distribution can vary by 20% or more, which shows up as visible scratch patterns. If you're switching suppliers, test on scrap first rather than trusting the label blindly. Even within one standard, some budget brands use wider tolerances, so the actual abrasive behavior feels bumpier than the number suggests.
The most persistent myth is that grit progression must follow a rigid doubling sequence—80, 120, 180, 240, and so on. In real work, skipping a step often saves time without hurting the final result. Woodworkers frequently jump from 120 straight to 220 after a light sanding sealer coat, because the sealer fills minor scratches. Metal polishers sometimes go from 400 to 800 with a lubricant that washes away loose particles. The key is to read the surface, not the arithmetic. If the previous grit's marks are gone and the sheen is even, you can move on—no need to treat the number itself as gospel.
Cost Per Part: The Metric That Exposes Cheap Abrasives
On paper, a low-priced abrasive looks like a win. But the real question isn't what you pay per disc or belt—it's what you pay per finished part. That shift in accounting changes everything. A cheap abrasive that cuts slowly, glazes over, or disintegrates after a few passes forces you to burn labor hours, replace media more often, and risk rework on inconsistent finishes. Suddenly, the savings vanish into the hidden costs of downtime and scrap.
Cost per part rewards abrasives that hold their edge longer and remove material with steady aggression. A premium product might cost twice as much upfront, but if it finishes three times the work before wearing out, your true cost drops sharply. Think about the operator standing at the grinder: every minute they spend swapping discs or fighting a dull surface is a minute not producing value. The metric exposes cheap abrasives not by shaming the price tag, but by revealing the productivity they quietly steal.
To run the comparison, track a simple formula: total abrasive spend plus labor time plus rework, divided by the number of good parts shipped. Run that test for a month with the bargain brand, then swap to a higher-tier option. The numbers rarely lie. What felt like frugality at the purchase order becomes a tax on throughput. Once you see the per-part figure, going back to the cheap stuff feels like paying someone to slow you down.
Field-Testing Abrasives Before You Commit to a Full Order
Most abrasive suppliers will send out a handful of discs or belts at no charge, but the real test is putting them on your own machines, with your own operators, against the exact welds, edges, and surface defects you deal with daily. A bench test or a quick pass on scrap tells you almost nothing. Run the sample on the same workholding, at the same speed, and for the same amount of time you would normally run. Watch how the abrasive loads up, how much pressure it takes to keep the cut steady, and whether the finish shifts as the grain breaks down.
Track two or three numbers that matter on your floor: parts finished per disc, consistent surface finish after the first few minutes, and what the operator actually thinks about vibration and hand fatigue. Cheaper abrasives often look fine for the first ten parts, then fall off a cliff. A slightly higher upfront cost per disc can beat a bargain if it holds its edge longer and requires fewer changeovers. If possible, run the sample and your current abrasive side by side on identical parts, and mark each disc with the date and job number.
Don't make the call based on one trial. Abrasive performance shifts with humidity, metal temperature, and even the batch of backing material. Ask for enough samples to cover a few different shifts or jobs. Then place a smaller initial order before committing to a full pallet. That way you can catch lot-to-lot variation early, and you have leverage to go back to the supplier if the production run doesn't match what the samples promised.
FAQ
The three you'll see most often are aluminum oxide, silicon carbide, and ceramic alumina. Aluminum oxide is the workhorse—tough, versatile, and affordable, but it dulls faster on hard metals. Silicon carbide is sharper and more brittle, so it cuts faster on non-ferrous materials like glass, rubber, or stone, yet wears down quickly on steel. Ceramic alumina is the premium choice: it self-sharpens under heat and pressure, delivering consistent cut rates on tough alloys and stainless steel, often at a higher upfront cost.
Think of grit as the trade-off between speed and smoothness. Coarse grits (24–60) remove material aggressively but leave deep scratches, making them ideal for heavy stock removal or weld blending. Medium grits (80–120) are a middle ground for surface prep. Fine grits (150 and higher) produce a polished or paint-ready finish. A practical approach: start with the coarsest grit that gets the job done without extra rework, then step up one or two grit levels if the surface needs refinement. The exact finish also depends on your tool speed and pressure.
Go with ceramic if you're processing high-value metals—stainless steel, titanium, nickel alloys—or doing long production runs. Ceramic grains fracture into sharp edges as they wear, so they keep cutting efficiently instead of glazing over. Aluminum oxide works fine for general-purpose grinding on mild steel, wood, or when cost per disc is the biggest concern. The rule of thumb: if downtime from frequent disc changes costs more than the price difference, ceramic pays for itself fast.
The bond holds abrasive grains together and determines how quickly they're released. A hard bond holds grains longer, which is better for soft materials that don't dull the abrasive quickly. A soft bond releases grains sooner, exposing fresh cutting edges—essential for hard metals that would otherwise glaze the wheel. The mismatch is common: using a hard-bonded wheel on hard steel leads to burning and slow cutting, while a soft bond on soft wood just wastes abrasive. Match the bond hardness inversely to the workpiece hardness.
For steel, aluminum oxide or ceramic works well; ceramic excels on alloys with high tensile strength. Aluminum and other non-ferrous metals clog standard abrasives because they're soft and gummy—use silicon carbide or a specialized non-loading coating to prevent buildup. Wood demands a very sharp, friable grain like white aluminum oxide or silicon carbide, often with an open-coat design so sawdust doesn't pack the surface. The key is matching grain sharpness and coating openness to the material's tendency to smear or clog.
Coated abrasives—discs, belts, sheets—are flexible and ideal for contoured surfaces, blending, and portable tools. Bonded abrasives—grinding wheels, mounted points—offer rigidity and precision for heavy stock removal or dimensional work. Ask yourself: is the part flat or curved? Do you need to remove a lot of material or just refine a surface? Coated products give you more control over finish, while bonded wheels provide aggressive cutting power and longer life in stationary applications.
Cheap abrasives often cost more per finished part. A low-cost disc might wear out in 10 minutes and produce inconsistent finishes, leading to rework and downtime. A premium abrasive may cost twice as much but last three times longer and cut faster, reducing labor hours and machine idle time. Calculate total cost per part: abrasive price plus labor, rework, and consumable change time. In high-volume or high-value work, the premium product almost always wins on total cost, even if the sticker price looks worse.
The biggest error is buying on price alone without testing against the actual application. Another is using one abrasive for everything—different materials and tasks need different grains, grits, and bonds. Many also run abrasives at the wrong speed or pressure, which either glazes the surface or tears the backing. To avoid these pitfalls: test a small batch on your exact workpiece, track usage data for each abrasive type, and train operators to adjust speed and pressure based on the grain's breaking characteristics. A few hours of testing can prevent months of poor finishes and wasted spend.
Conclusion
Relying on a familiar brand name when ordering abrasives is one of the most common mistakes in metalworking. The right choice starts with the material you are actually grinding or finishing. Aluminum oxide works well for general steel, but stainless steel often demands zirconia or ceramic grains that stay sharp and resist loading. Even within the same grain family, the bond that holds the abrasive particles determines how fast the product cuts and how it behaves under heat. A soft bond releases dull grains quickly, while an overly hard bond can glaze and stop cutting. Grit numbers also mislead more often than they help because there is no universal standard between manufacturers. One supplier's 60 grit can remove material like another's 80 grit, so direct comparison on your own workpiece matters far more than the label on the box.
Beyond the initial price, cost per finished part reveals the real economics of an abrasive. A cheap disc that wears down in minutes or requires frequent changes often costs more in labor and downtime than a premium product that lasts through the shift. That is why field-testing small quantities before a full order is essential. Run each candidate abrasive on the same machine, at the same angle and pressure, and track not just spark and surface finish but also heat buildup and operator fatigue. Accept nothing until you see how it performs on your actual metal, not a demo piece. In the end, the most reliable abrasive is not the one with the strongest marketing or the lowest unit price, but the one that gives you consistent results, predictable wear, and the lowest true cost per part on your floor.
Contact Us
Contact Person: Amanda Wang
Email: [email protected]
Tel/WhatsApp: +86-13602569854
Website: https://www.sunabrasives.com.cn